{DIY} Ribbon Garland Tutorial
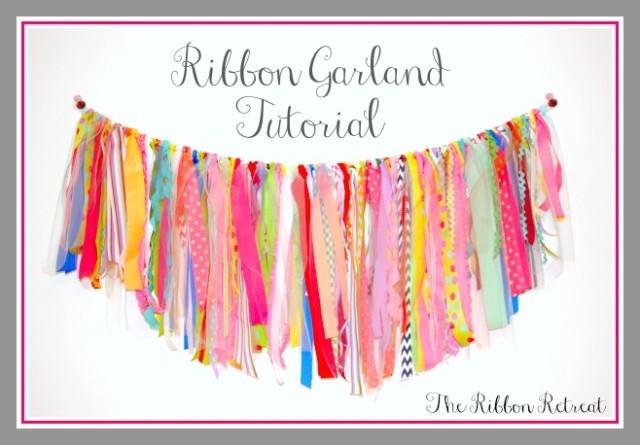
Another Spring cleaning idea with Scrap ribbons: RIBBON GARLAND.
It’s easy and fast to make. All you need is LOTS and LOTS of ribbon, tulle, ric rac of various sizes, a movie, and of course…treats!
By the time your movie is over and your treat is devoured, your masterpiece will be done and ready to hang on your wall.
See tutorial from the Ribbon Retreat below.
Now…we are ready to create!
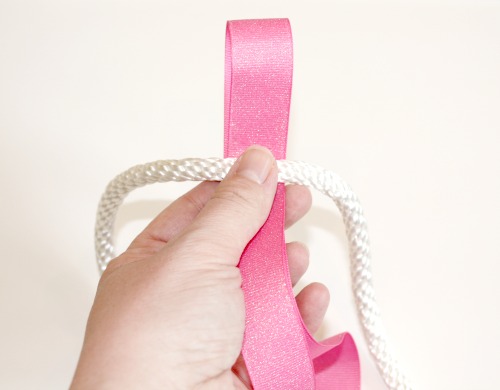
Get your rope and a piece of ribbon. The length of ribbon does not necessarily matter, because you will most likely end up trimming it.
Fold the ribbon in half with the loop at the top. Place the ribbon behind the rope.
Take the tails of your ribbon and put them through your loop. (The tails of your ribbon will be on top of your rope.) Once the tails are through the loop, pull hard…really hard.
This will attach your ribbon to your rope.
You are going to continue the above 3 steps for the remainder of your garland.
I pushed my ribbons really, really close together to make it look fuller.
I made a loop at the end of my rope so I could hang the garland.
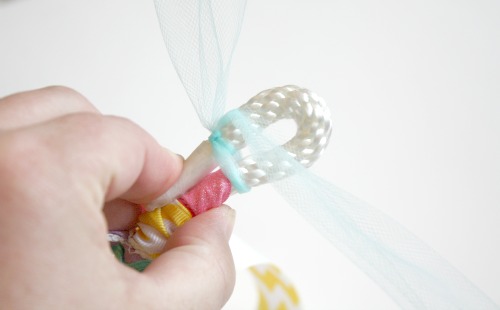
I did this by first taping the ends of the rope so they would not fray. I then tied tulle to the rope next to the tape.
Pull tulle tight.
Bend the rope to make a loop. Start winding the tulle around the rope to secure the loop. Wind the tulle multiple times and pull tight.
Bring tulle through the loop and tie a knot. This will secure the loop and tulle.
To hide the wound and knotted tulle, repeat the first 3 steps and hang tulle from the rope.
Repeat on other end of the rope.
:: Credit ::
- Shared by Simply Tale
- Category Uncategorized
Search this site
ETSY shop
Search Amazon
Credits
It is my intention to give 'credit' to whoever the picture belongs to, but Ooops does happen. If you find pictures that belong to you without 'noted' source, please let me know.


No Response to This Post